
CLEANING
AIRBAG VESTS
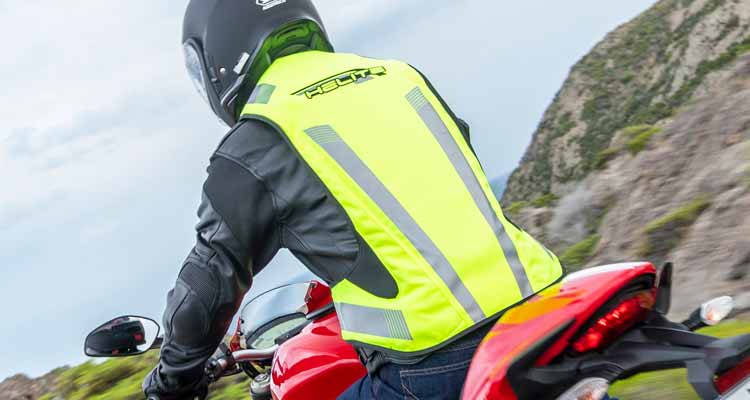
HOW TO CLEAN YOUR HELITE AIRBAG VEST
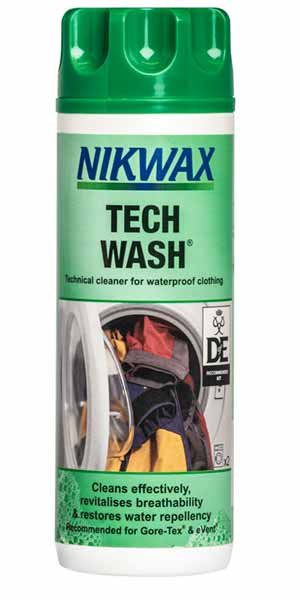
Keeping your HELITE Turtle airbag vest clean is best achieved by wiping down regularly. If you need to clean more thoroughly, we recommend sponging down using NIKWAX TECHWASH.TIME NEEDED
Allow 20 minutes, then allow to dry naturally for 24 hoursHOW TO CLEAN AIRBAG VESTS
EQUIPMENT NEEDED
- 300ml NIKWAX TECHWASH
- Sponge
- Micro-fibre Cloths
- Old Towel
- Coat Hanger
- Plastic Bowl
PREPARATION
Hang an old towel over the top of your shower cubicle to prevent accidental scratching. Place the vest on a suitable hanger, and hang over the towel inside the shower.
CLEANING
Dilute your TECHWASH in warm water following the instructions for hand washing. Using the sponge, apply and work up a lather on the affected area. Light, circular motions work best. Avoid heavy pressure, especially on any reflective areas. Do not use solvents of any kind. Be gentle! More stubborn marks may be removed using a micro-fibre cloth. Only use gentle, circular motions.
Rinse thoroughly with luke warm water. Turn and repeat on the other side. When complete allow to dry naturally.
TOP TIPS
Avoid wetting the trigger mechanism as much as possible. To improve household harmony, best avoid busy times in the bathroom :-)
WASHING
AIRBAG JACKETS
HOW TO WASH AND REPROOF YOUR HELITE TOURING AIRBAG JACKET
Keeping your HELITE Touring / Adventure airbag jacket clean is best achieved by wiping down regularly. Over time, traffic emissions and pollution particles will clog up the humax breathable membrane. When this happens, rain water may wick through. If you need to clean more thoroughly, we recommend washing and reproofing using NIKWAX TECHWASH and TX DIRECT to remove pollutants and reproof your Jacket.TIME NEEDED
Allow 10 minutes for airbag removal, 45 minutes for machine wash and then allow to dry naturally for 24 hours. Refitting the airbag system will take 15 minutes.HOW TO WASH AND REPROOF AIRBAG JACKETS
EQUIPMENT NEEDED
- 300ml NIKWAX TECHWASH / TX DIRECT PACK
- Old Towel
- Table
- Washing Machine
- Mobile Phone for photos
PREPARATION
Clear a table in a well lit area and place an old towel over the top to prevent accidental scratching. Place your jacket facing you and working systematically, check and empty all pockets, including the interior and rear if applicable.
HOW TO REMOVE THE CANISTER
Locate the canister pocket, open and unthread the trigger pull. Unscrew the canister and set aside.
HOW TO REMOVE THE THERMAL LINER
Opening the jacket, unzip the quilted liner. Locate the 2 retaining buttons in each sleeve and release from elastics. Remove the quilted liner and set aside for washing separately.
HOW TO REMOVE THE AIRBAG
Place the jacket open facing you on the table with the hem nearest you. Locate and open the long zip that runs across the lower hem . Lifting the jacket liner will reveal the airbag system. If you can, ask a helper to hold the jacket liner open for you. Note the airbag is coloured GREEN on the side facing you, BLACK facing away. Take a moment to locate the two top short zips at the neck of the jacket. Take photos with your phone to show how the airbag is threaded through the back protector carrier. Take photos as you undo each colour coded short zip.
Thread the airbag through the back protector carrier, noting how it is fitted. Take photos as you go. Working anti clockwise from the bottom, locate and separate each velcro securing tabs. These are colour coded and support the airbag within the jacket outer. Take your time and be gentle, when all are located the airbag will come away from the outer. If it does not, likelihood is you have missed some. Note the position of the velcro tabs supporting the neck section of the airbag. Locate the velcro securing the trigger to the front of the jacket, carefully separate from the jacket outer. Take plenty of photos. Once free, remove and set the airbag system to one side. Arrange the airbag as though it was in the jacket, green side facing you, take a photo.
HOW TO REMOVE JACKET ARMOUR
Locate and remove the elbow and shoulder armour, noting the position and orientation.
TOP TIPS
The quilted liner has colour coded sleeve buttons and securing elastics to avoid twisting. Taking lots of photos will help you when it comes to putting the airbag back into the jacket. A helper is useful to support the jacket liner whilst you remove / replace the airbag system.
HOW TO WASH AND RE-PROOF
Place the jacket outer only in the washing machine. Following the instructions on the TECHWASH bottle, place the required amount of capfuls into the drum in place of detergent. Pour the correct amount of TX DIRECT into the fabric conditioner tray. Select 'WOOL WASH' or 'DELICATES' cycle on the washing machine and 30 degrees.
Put the kettle on, make a cup of refreshing tea :-)
Once the cycle is complete, hang the jacket to dry naturally. DO NOT TUMBLE DRY.
HOW TO WASH THERMAL LINER
Helite Touring Jacket liners should be washed separately as they do not need reproofing solution. Follow the garment care label advice of selecting a 30 degree, delicate wash. While this is happening, take the time to de-clutter the contents of your jacket pockets. Avoid carrying sharp objects in your pockets, including keys. Transfer these to a top box or tank bag.
HOW TO REFIT YOUR HELITE AIRBAG
Put the kettle on. Review your photos over a cup of tea :-). Relocate the armour in shoulders and elbows.
Remind yourself of the airbag orientation. Recruit a helper to hold the jacket inner open for you. Refit starting with the trigger mechanism, working your way around the velcro tabs clockwise. Complete with the two small zips at the top of the back protector. Remember that the airbag should not be twisted and GREEN side should be facing you.
Refit the quilted liner if required. Refit the CO2 canister, and thread the trigger pull through the grommet. Close the zip into the canister pocket.

LEATHER
JACKET CARE

HOW TO CLEAN YOUR HELITE LEATHER AIRBAG JACKET
Keeping your HELITE Leather Airbag Jacket looking great is easy and with a little regular care, it will last for years. Riding subjects jackets to the full force of the weather, even on dry days! All manner of insects and road grime get embedded into the surface of the jacket.TIME NEEDED
Allow 20 minutes, then allow to dry naturally for 24 hoursHOW TO CLEAN YOUR HELITE LEATHER AIRBAG JACKET
EQUIPMENT NEEDED
- 250ml RENAPUR LEATHER CLEANER
- 200ml RENAPUR LEATHER BALSAM
- Application Sponges
- Old Towel
- Coat Hanger
- Plastic Jug
- Lint Free Cloth
PREPARATION
Clear a table in a well lit area and place an old towel on top to prevent scratches. Place the jacket facing you on the table and systematically work around the jacket ensuring all pockets are empty, including the inner pocket.
REMOVING THE JACKET LINER
Locate and disconnect the colour coded securing elastics and buttons in each sleeve. Open the jacket, locate and unfasten the liner securing zip. Note some designs have a press stud at the neck, release if present. Remove the liner and wash separately.
TOP TIPS
WARNING! This guide is for HELITE ROADSTER (Black, Mens) and HELITE XENA (Black, Womens) and HELITE CUSTOM (Black, Unisex) ONLY.
If you have a vintage brown HELITE ROADSTER jacket please request professional cleaning only.
Always the products on an inconspicuous area of your jacket. As a natural product, leather is individual and variable. Some darkening may occur, particularly if the jacket is older or the leather has dried out. Plan your route around your jacket, dividing it up into sections.
CLEANING THE LEATHER
WARNING! This guide is for HELITE ROADSTER (Black, Mens) and HELITE XENA (Black, Womens) and HELITE CUSTOM (Black, Unisex) ONLY.
If you have a vintage brown HELITE ROADSTER jacket please request professional cleaning only.
Dilute your RENAPUR LEATHER CLEANER in warm water following the instructions on the bottle. Using a clean sponge, apply a little water to dampen the surface of the leather. Apply the diluted cleaner sparingly and work up a lather on the affected area. Light, circular motions work best. Avoid heavy pressure. Do not use solvents of any kind. Be gentle! More stubborn marks may be removed using undiluted cleaner.
Rinse with clean water. Turn and repeat on the other side. When complete, hang up and allow to dry naturally away from direct sunlight or artificial heat. Take the opportunity for a refreshing cup of tea :-)
TREAT YOUR HELITE LEATHER AIRBAG JACKET
Using a clean applicator sponge, apply RENAPURE LEATHER BALSAM sparingly - do not use too much as it should all be absorbed into the leather.
Dip the application sponge into the pot of balsam and wipe the sponge over the edge of the pot to remove any excess. Generally speaking if you can see Renapur Balsam on the sponge you are using too much.
Gently work the treated sponge over the leather. The Balsam will quickly absorb into the leather working its leather cleaning magic as it goes.
No need to buff – but if you have applied too much Renapur Leather Balsam and it hasn’t all been absorbed into the leather, then simply wipe off the excess with a soft, clean, lint free cloth.
